Is your shower or bathtub showing signs of wear and tear? Are you noticing cracks or gaps around the edges? It might be time to caulk! Caulking is a simple and effective way to seal those gaps and keep water from seeping into places it shouldn’t. Don’t worry if you’re not a DIY expert – we’ve got you covered with this easy-to-follow guide on how to caulk a shower or bathtub.
Here’s what you’ll need:
Caulk gun: This tool will help you apply the caulk evenly and precisely.
Oscillating tool: It can come in handy for removing old caulk or other stubborn materials.
Putty knife: Useful for scraping away old caulk or preparing the surface.
Rags: These will help you clean the area before applying the new caulk.
Razor scraper: Ideal for removing any residue left behind after scraping.
Utility knife: Can be used for cutting the caulk tube tip and removing old caulk.
Caulk containing mold and mildew prevention additives: Look for a caulk specifically formulated to resist mold and mildew growth.
Caulk remover: In case you need to remove old caulk, this product will come in handy.
Masking tape: Helps create clean, straight lines while applying caulk.
Mineral spirits: Used to clean up any excess caulk or remove residue.
Paper towels: Essential for wiping away excess caulk and cleaning up messes.
Now that you have your tools and materials ready, let’s get started!
Step 1: Prepare the surface
Use the oscillating tool, putty knife, or razor scraper to remove any old caulk or debris from the area you’re going to caulk. Make sure the surface is clean, dry, and without any loose debris.
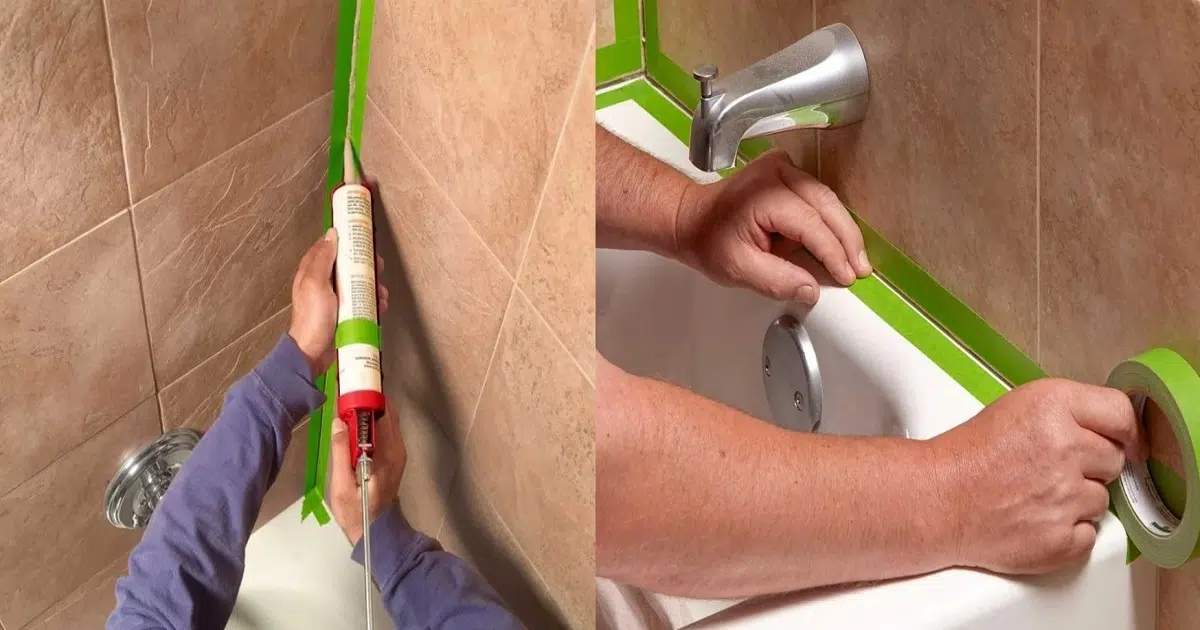
Step 2: Apply masking tape (optional)
If you want to achieve clean, straight lines, apply strips of masking tape along the edges of the area you’ll be caulking. This will help guide you and prevent excess caulk from spreading to unwanted areas.
Step 3: Load the caulk gun
Cut the tip of the caulk tube using a utility knife. The size of the opening will depend on the width of the gap you’re filling. Load the tube into the caulk gun, making sure it fits securely.
Step 4: Apply the caulk
Hold the caulk gun at a 45-degree angle and apply a smooth and even bead of caulk along the gap or joint. Move steadily and apply consistent pressure to ensure a uniform application. If you’re using masking tape, fill the gap up to the tape.
Step 5: Smooth the caulk
Dampen your finger or a rag with water (or mineral spirits if using silicone caulk) and run it along the caulk line to smooth it out. This step helps create a neat finish and ensures proper adhesion.

Step 6: Remove excess caulk
Using a damp rag or paper towel, carefully wipe away any excess caulk from the surface and surrounding areas. This will give your caulking job a professional look.
Step 7: Let it dry
Let the caulk dry as per the manufacturer’s instructions. This usually takes several hours or overnight. Avoid using the shower or bathtub during this time to ensure the caulk sets properly.
Step 8: Clean up
Clean your tools and hands with mineral spirits to remove any remaining caulk residue. Dispose of the used materials properly.
Congratulations! You’ve successfully caulked your shower or bathtub. Now you can enjoy a watertight seal and prevent further damage or leaks.
Remember, regular maintenance is key to keeping your caulk in good condition. Inspect it periodically for signs of wear and replace as needed. By following these simple steps, you can prolong the life of your shower or bathtub and maintain a clean and healthy environment in your bathroom.
Now that your caulk is fresh and your tub is sealed tight, make sure the rest of your bathroom stays just as clean — find out how often should you clean your bathtub or shower to keep things sparkling and sanitary.